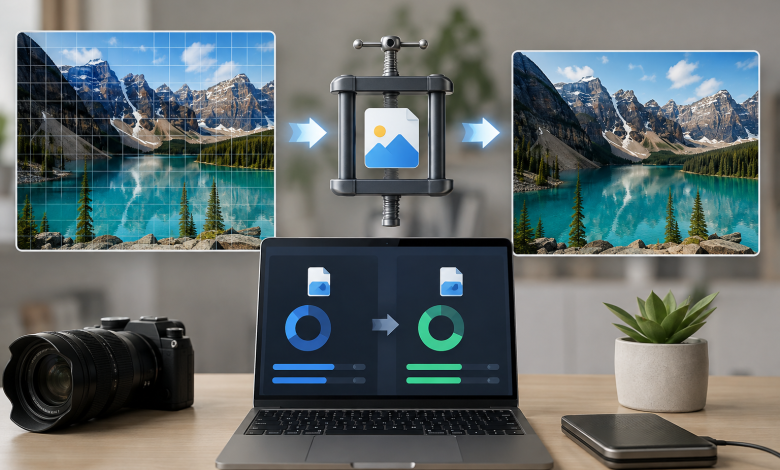
A high-resolution image can make a website, online store, blog post, or social media project look polished. The problem is that large image files can also slow down pages, consume storage, take longer to upload, and create unnecessary friction for visitors using mobile connections.
The good news is that reducing an image’s file size does not necessarily mean making it look noticeably worse. With the right compression method, format, dimensions, and settings, you can often make an image significantly smaller while preserving most of the visual detail that matters.
Image compression is useful for almost anyone who works with digital content. Bloggers can improve page performance, marketers can prepare campaign assets faster, developers can optimize websites, and small businesses can make product images easier to manage. There are also many online tools and software applications that automate much of the process.
This guide explains how image compression works, the difference between lossy and lossless compression, which image formats to use, how AI tools can help, and how to build a simple image-optimization workflow without sacrificing more quality than necessary.
What Is Image Compression?
Image compression is the process of reducing the amount of data required to store an image.
A digital image contains information about colors, pixels, textures, transparency, and other visual characteristics. Depending on its dimensions and format, an image can contain a surprisingly large amount of data.
For example, a photograph taken with a modern smartphone may have a resolution of thousands of pixels in both width and height. The original file may be several megabytes even though the image is ultimately displayed in a relatively small area on a website.
Compression attempts to reduce that file size.
There are two broad approaches:
- Lossy compression removes some image information to achieve a much smaller file.
- Lossless compression reduces file size without permanently removing image information.
The important point is that compression is not the same thing as simply reducing image dimensions. Resizing, changing the format, adjusting quality, and removing unnecessary metadata can all contribute to a smaller file.
Why Should You Compress Images?
Image compression is particularly important for websites and digital workflows because large files can create several problems.
Faster Website Loading
Large images require more data to download. If a page contains multiple high-resolution photographs, visitors may have to wait longer before the page becomes fully usable.
This is especially noticeable on mobile networks or slower connections.
Compressing images can reduce the amount of data browsers need to download, potentially improving the overall loading experience.
Better Mobile Performance
Many visitors access websites from smartphones. Mobile devices may have limited bandwidth, slower connections, or restricted data plans.
An image that seems reasonably sized on a desktop computer may still be unnecessarily large for a mobile visitor.
Optimizing images helps reduce the amount of data transferred to the device.
Lower Storage Requirements
If you manage thousands of product photos, blog images, screenshots, or marketing assets, storage requirements can grow quickly.
Compressing files before archiving them can make digital asset management more efficient.
Faster Uploads and Sharing
Smaller files are easier to upload to websites, email systems, cloud storage, messaging applications, and content management systems.
This can make everyday work more efficient, particularly for creators and small businesses that regularly process large numbers of images.
More Efficient Content Workflows
Image optimization can become part of an automated workflow.
For example, a content team might create an original image, resize it, convert it to a web-friendly format, compress it, rename it, and then upload the optimized version.
Automation tools can handle some or all of these steps automatically.
Lossy vs. Lossless Image Compression
Understanding the difference between lossy and lossless compression is one of the most important parts of image optimization.
What Is Lossy Compression?
Lossy compression reduces file size by removing some visual information.
The removed information usually cannot be restored simply by opening the compressed image again.
The advantage is that lossy compression can produce substantial reductions in file size while maintaining an acceptable visual appearance.
JPEG is a common example of a format that is frequently used with lossy compression.
Lossy compression is often appropriate for:
- Photographs
- Blog images
- Product photos
- Travel pictures
- Social media graphics containing photographic content
- Website backgrounds
The key is to avoid pushing the compression level too far.
An image compressed aggressively may develop visible artifacts such as blockiness, blurred edges, ringing around text, or loss of fine detail.
What Is Lossless Compression?
Lossless compression reduces the amount of data without permanently discarding image information.
When the file is decompressed, the original image data can be reconstructed.
This approach is useful when preserving exact image information is important.
Lossless compression can be appropriate for:
- Graphics requiring precise details
- Certain screenshots
- Images that will be edited again
- Technical diagrams
- Images containing important text
- Archival purposes
However, lossless compression generally cannot reduce file sizes as dramatically as aggressive lossy compression.
Choose the Right Image Format
One of the easiest ways to reduce image size is to choose an appropriate file format.
JPEG
JPEG remains widely used for photographs and other images containing many colors and gradual transitions.
It supports lossy compression, allowing users to adjust the balance between file size and visual quality.
JPEG is often a practical choice for:
- Photographs
- Blog post images
- Product photography
- General-purpose web images
Its main limitation is that repeated editing and saving can introduce additional compression artifacts.
PNG
PNG is particularly useful when transparency or sharp graphical details are important.
It can be an excellent choice for logos, interface graphics, screenshots, and illustrations, although it may produce much larger files than JPEG when used for photographs.
A common mistake is saving every photograph as PNG simply because PNG preserves high quality. The resulting file can be unnecessarily large.
WebP
WebP was designed for efficient web delivery and can provide smaller files than older formats in many situations.
It supports both lossy and lossless compression as well as transparency.
For websites, WebP can be a practical alternative to JPEG and PNG when browser and application compatibility requirements allow it.
AVIF
AVIF is another modern image format designed for efficient compression.
It can produce highly compressed images while maintaining strong visual quality, making it attractive for modern web applications.
However, workflow compatibility matters. A format that provides excellent compression is not useful if the software, publishing platform, or audience workflow cannot handle it properly.
The Best Format Depends on the Image
There is no universal “best” image format.
A photograph, logo, screenshot, illustration, and transparent icon have different characteristics.
Instead of automatically converting everything to one format, consider what the image contains and where it will be used.
Resize the Image Before Compressing It
One of the most overlooked aspects of image optimization is image dimension.
Imagine you have a photograph measuring 6,000 × 4,000 pixels, but your website displays it at only 1,200 × 800 pixels.
Sending the full-resolution original to the browser may be unnecessary.
Resizing the image to a more appropriate display size can dramatically reduce the amount of data.
This is different from simply changing the quality setting.
A huge image compressed at a high quality level may still be much larger than a properly resized image.
Avoid Oversizing Images
Before exporting an image, ask:
How large does this image actually need to be?
If a website’s content area is approximately 1,000 pixels wide, uploading a 5,000-pixel image may provide little practical benefit.
For responsive websites, you may want to generate multiple versions of an image for different screen sizes rather than serving one enormous file to everyone.
This approach is particularly useful for developers and publishers managing performance-sensitive websites.
How to Compress Images Without Losing Too Much Quality
A reliable compression workflow does not depend on one magic setting.
Instead, use several small optimizations.
Step 1: Start With the Original
Keep an original, high-quality copy before performing destructive compression.
This gives you a master file that can be reused later.
Do not repeatedly compress the same JPEG every time you need another version. Instead, return to the original and generate a new optimized copy.
Step 2: Determine the Required Dimensions
Decide where the image will be displayed.
For example, a blog’s featured image may not need the same dimensions as an image intended for printing.
Resize the image to a practical resolution before exporting it.
Step 3: Choose the Appropriate Format
Use JPEG, WebP, AVIF, PNG, or another suitable format based on the content.
Photographs usually benefit from efficient photographic formats, while graphics with transparency may require a different approach.
Step 4: Apply Moderate Compression
Start with a relatively conservative quality setting.
Export the image and compare it with the original.
If the visual difference is difficult to notice, you can experiment with stronger compression.
The goal is not to obtain the smallest possible file. The goal is to obtain the smallest file that still looks good for its intended purpose.
Step 5: Inspect the Result at 100%
Do not judge compression only from a tiny thumbnail.
Open the original and compressed versions at a comparable viewing size.
Look closely at:
- Faces
- Text
- Fine lines
- Hair
- Product edges
- Textures
- Shadows
- Gradients
- Areas with high contrast
Compression artifacts are often easier to notice around these areas.
Step 6: Compare File Size
Record the original and compressed file sizes.
For example, if an image falls from several megabytes to a few hundred kilobytes while still looking visually good, the optimization may be worthwhile.
But a tiny file is not automatically better.
If reducing an image from 300 KB to 100 KB creates obvious artifacts, the additional reduction may not justify the quality loss.
Online Tools for Image Compression
Online tools are convenient because they generally do not require users to install specialized software.
You can upload an image, choose compression settings when available, and download the optimized version.
This makes online tools useful for beginners, freelancers, bloggers, and small teams.
When evaluating an online image compressor, consider:
- Supported file formats
- Maximum upload size
- Compression controls
- Batch processing
- Output quality
- Privacy policies
- Whether files are stored temporarily
- Download options
- Watermarks
- Free-plan limitations
For ordinary public images, an online service may be perfectly convenient.
However, be more careful when uploading confidential business documents, private photographs, identification documents, or other sensitive material.
Desktop Software for More Control
Desktop image-editing software can be preferable when you need precise control over the output.
Applications designed for professional image editing often provide options for:
- Image dimensions
- Resolution
- File format
- Quality
- Metadata
- Color profiles
- Transparency
- Export settings
The downside is that professional software can have a steeper learning curve.
For someone who only needs to compress a few images occasionally, an online tool may be faster.
For designers, developers, photographers, and content teams processing images every day, dedicated software can provide more control.
Can AI Tools Compress Images?
AI tools are increasingly being used in image-related workflows, but it is important to understand what AI contributes.
Traditional compression algorithms already provide sophisticated methods for reducing file size. AI-powered systems may go further by analyzing image content and making intelligent decisions about resizing, enhancement, denoising, sharpening, or quality preservation.
For example, an AI-assisted workflow might identify important visual details and attempt to preserve them while reducing less noticeable information.
AI can also be useful when compression is combined with other tasks.
A content workflow could involve:
- Uploading an original image.
- Automatically removing unnecessary background elements.
- Resizing the image.
- Improving visual clarity.
- Converting it to a web-friendly format.
- Compressing the final version.
- Delivering the result to a website or content-management system.
This is where AI tools and automation tools become particularly interesting.
Instead of manually processing every file, repetitive image tasks can become part of an automated workflow.
Still, AI does not eliminate the need for human review. An algorithm can produce an image that technically has a smaller file size but visually performs worse for a particular purpose.
Image Compression for Bloggers
Bloggers often upload images directly from cameras or smartphones without considering their dimensions.
This can create unnecessarily large pages.
A simple blogging workflow might be:
Original photo → resize → convert → compress → inspect → upload
For a typical article, there is rarely a reason to upload the untouched camera original unless the article specifically requires extremely high resolution.
Bloggers should also avoid using decorative images that are much larger than the space where they appear.
The objective is to make the image appropriate for the page, not simply to preserve the maximum possible resolution.
Image Compression for E-Commerce
Online stores can benefit significantly from image optimization because product pages often contain multiple photographs.
A single product may have:
- Front view
- Side view
- Detail image
- Lifestyle photograph
- Packaging photograph
- Color variations
If every image is several megabytes, the page can become unnecessarily heavy.
A better workflow is to prepare consistent image dimensions and compression settings across the product catalog.
However, product photography requires special care.
Over-compression can make fabrics, textures, product finishes, small labels, and fine details look inaccurate.
For e-commerce, visual accuracy should take priority over achieving the absolute smallest file size.
Image Compression for Social Media
Social media platforms often process uploaded images themselves.
Even so, starting with a reasonably optimized image can make uploads faster and reduce unnecessary file size.
Creators should also pay attention to the platform’s recommended dimensions and aspect ratios.
Uploading an enormous image and relying entirely on the platform to resize it is not always the most efficient workflow.
Prepare an appropriately sized version first, particularly when publishing many images regularly.
Image Compression for Developers
Developers have additional considerations because image optimization affects the entire website or application.
A development workflow may include:
- Automatic image resizing
- Responsive image generation
- Modern image formats
- Compression during deployment
- CDN-based image optimization
- Lazy loading
- Caching
- Automated asset processing
The exact implementation depends on the technology stack.
For larger websites, manual compression may not scale well. Automated image optimization can reduce repetitive work and make publishing more consistent.
This is a good example of how automation can improve productivity: instead of asking a content editor to remember every optimization step, the system can perform many of them automatically.
Batch Compression Can Save Time
If you have dozens or hundreds of images, processing them individually can become tedious.
Batch compression allows multiple images to be processed together.
This is useful for:
- Product catalogs
- Blog archives
- Photography collections
- Marketing campaigns
- Website migrations
- Large media libraries
Before processing a large batch, test the settings on a small group.
Different images can behave differently under compression. A setting that works beautifully for photographs may be less suitable for screenshots or graphics containing text.
Common Image Compression Mistakes
Compressing Too Aggressively
The smallest file is not always the best file.
Excessive compression can create visible artifacts and make an otherwise professional image look poor.
Resizing After Heavy Compression
If possible, resize and prepare the image from a high-quality source rather than repeatedly editing a heavily compressed version.
Using PNG for Every Photograph
PNG can be excellent for certain graphics, but it is not automatically the most efficient choice for photographs.
Uploading Huge Images and Letting the Website Handle Everything
A website’s optimization system can help, but sending unnecessarily large originals to the server can still consume storage and processing resources.
Ignoring Transparency
Converting an image without checking transparency can create unwanted backgrounds or visual changes.
Forgetting Metadata
Some images contain metadata that is not necessary for web delivery.
Depending on the workflow, removing unnecessary metadata can contribute to smaller files. However, photographers and professionals should preserve metadata when it has legitimate archival or business value.
Compressing Without Checking the Result
Never assume an image is acceptable simply because the compression process completed successfully.
Always inspect important images before publishing.
How Much Quality Should You Sacrifice?
There is no universal compression percentage that works for every image.
A photograph containing lots of texture may tolerate compression differently from a screenshot containing small text.
The correct question is not:
“What is the maximum compression I can apply?”
A better question is:
“What is the smallest file that still looks good for this specific use?”
For a thumbnail, moderate visual degradation may be nearly invisible.
For a product photograph, subtle quality loss may matter much more.
For a professional portfolio, preserving fine detail may justify a larger file.
For a temporary preview image, aggressive compression may be perfectly reasonable.
The intended use should determine the quality target.
A Practical Image Optimization Workflow
For people who frequently work with digital content, the following workflow is simple and repeatable:
1. Keep the original.
Store a high-quality master copy separately.
2. Identify the destination.
Determine whether the image is for a website, email, social media, print, archive, or another purpose.
3. Resize it.
Use dimensions appropriate for the final display.
4. Select the format.
Choose a format based on the image’s characteristics and compatibility requirements.
5. Compress moderately.
Start conservatively and increase compression only when necessary.
6. Inspect visually.
Check important details at an appropriate viewing size.
7. Compare file sizes.
Make sure the optimization produces a meaningful reduction.
8. Automate repetitive steps.
If you process many images, consider batch tools or an automated workflow.
This process is simple enough for beginners but scales well to more sophisticated publishing environments.
When Should You Avoid Heavy Compression?
There are situations where image quality matters more than file size.
Avoid aggressive compression when:
- The image is intended for professional printing.
- The image will be edited repeatedly.
- Fine technical details are important.
- Small text must remain perfectly readable.
- The image is part of a professional portfolio.
- Accurate product details are critical.
- The file is being preserved as an archival master.
In these cases, maintain a high-quality original and create a separate optimized copy for web or distribution.
A Simple Rule for Choosing Compression
If you are unsure how aggressively to compress an image, use a three-stage comparison:
Original → Moderate compression → Stronger compression
Open all three versions side by side.
If the moderate version looks nearly identical to the original while being substantially smaller, use it.
If the stronger version is only slightly smaller but introduces obvious artifacts, there is little reason to use it.
This simple visual comparison is often more useful than blindly following a recommended compression percentage.
Privacy Considerations When Using Online Tools
Online image compression services can be extremely convenient, but convenience should not override privacy.
Before uploading sensitive material, check the provider’s information about file handling and retention.
Be particularly cautious with:
- Identification documents
- Private photographs
- Confidential business documents
- Unreleased product designs
- Customer information
- Internal company screenshots
For sensitive files, local software may be a more appropriate choice if you want to keep the files on your own computer.
The same principle applies when incorporating image compression into automated workflows. Know where files are uploaded, processed, stored, and deleted.
The Future of Image Optimization
Image optimization is becoming increasingly automated.
Modern websites can combine responsive images, content delivery networks, modern formats, caching, and automatic transformations to deliver appropriate files to different devices.
AI may further improve this process by making more context-aware decisions about image quality and enhancement.
Instead of simply asking an algorithm to reduce a file by a certain percentage, future workflows can increasingly focus on perceptual quality: keeping an image visually convincing while minimizing the data required to deliver it.
For everyday users, the practical lesson is simple. You do not necessarily need to understand every compression algorithm to benefit from modern image optimization tools.
You need to understand the basic trade-off between quality, dimensions, format, and file size.
Frequently Asked Questions
Does compressing an image always reduce its quality?
No. Lossless compression can reduce file size without permanently removing image information. Even with lossy compression, a properly chosen quality setting can produce a significant size reduction while making the visual difference difficult to notice.
What is the best image format for websites?
There is no single format that is best for every situation. JPEG, WebP, AVIF, and PNG each have different strengths. Photographs, transparent graphics, screenshots, and illustrations may require different formats.
Is it better to resize an image before compressing it?
In many cases, yes. If the original image is much larger than its intended display size, resizing it first can eliminate unnecessary pixels and produce a substantially smaller file.
Can AI tools improve compressed images?
Some AI-powered applications can combine compression with enhancement, sharpening, denoising, resizing, or other processing. However, results vary by tool and image, so important images should still be reviewed manually.
Should I compress images before uploading them to my website?
Generally, preparing appropriately sized and optimized images before uploading can be beneficial. Some website platforms automatically optimize images, but starting with sensible dimensions and formats can still make your workflow more efficient.
Is online image compression safe?
It depends on the service and the type of image. For ordinary public images, online tools can be convenient. For confidential or sensitive files, review the provider’s privacy and file-retention policies or consider using local software.
How can I compress many images at once?
Look for batch-processing features in image optimization software or online tools. Developers can also integrate image processing into automated workflows so that images are resized and compressed during publishing or deployment.
Conclusion
Good image compression is about finding the right balance rather than chasing the smallest possible file.
Start with a high-quality original, resize the image to a sensible dimension, choose an appropriate format, and apply moderate compression. Then inspect the result instead of relying solely on a percentage or automated score.
For occasional tasks, online tools can make the process quick and accessible. For larger projects, dedicated software, batch processing, and automation tools can turn image optimization into a repeatable workflow.
The most important habit is to keep your original files separate from your optimized copies. That way, you can always create a different version when the image needs to be used somewhere else.
For bloggers, creators, developers, marketers, and small businesses, a few minutes spent optimizing images can make digital content easier to manage and more efficient to deliver. The best compressed image is not necessarily the smallest one—it is the one that achieves a practical file size while preserving the visual quality the audience actually needs.
Suggested Meta Description
Learn how to compress images without losing too much quality. Discover image formats, online tools, AI tools, compression methods, and practical workflows for smaller, faster images.
Suggested Internal Link Opportunities
Anchor Text: Best Online Image Compression Tools
Suggested Topic: A practical comparison of popular online tools for reducing image file sizes.
Anchor Text: WebP vs AVIF
Suggested Topic: WebP vs. AVIF: Which Modern Image Format Should You Use for Your Website?
Anchor Text: AI Tools for Content Creators
Suggested Topic: The Best AI Tools for Bloggers, Creators, and Digital Marketers.
Anchor Text: Website Speed Optimization
Suggested Topic: A Beginner’s Guide to Improving Website Loading Speed.
Anchor Text: Workflow Automation Tools
Suggested Topic: How Workflow Automation Can Reduce Repetitive Tasks for Small Businesses.
Sources to Verify
Before publication, the following authoritative resources can be consulted to verify technical details and current recommendations:
- MDN Web Docs — documentation covering web images, responsive images, image formats, and web performance.
- Google for Developers — guidance related to image optimization and website performance.
- WebP Documentation — official technical information about the WebP image format.
- Alliance for Open Media — technical resources related to the AV1 ecosystem and AVIF.
- W3C Web Performance Working Group — standards and technical information related to web performance.
Pricing, features, browser support, and capabilities of online tools and software may change over time, so readers should check the provider’s official website or current technical documentation before relying on a specific feature.